
Newborn Patriotic Hat and Leg Warmers - Free Crochet Pattern
- Amanda
- Apr 25, 2016
- 5 min read
Updated: Sep 4, 2021

This set would be so cute for newborn photos for a baby born on the 4th of July or for military babies or any baby, really! It's easy to make a works up quickly, perfect for a last minute handmade gift idea.
CROCHET PATTERN: Newborn American Flag Hat and Leg Warmers Set
SKILL LEVEL: Easy
This post may contain affiliate links. View full disclosure here.
MATERIALS
Crochet Hook size H8/5mm
Worsted Weight Yarn, in red, white and blue
Yarn Needle
ABBREVIATIONS
CH = Chain
DC = Double Crochet
HDC = Half Double Crochet
RND = Round
SC = Single Crochet
SL ST = Slip Stitch
GAUGE
2 inches = 7 double crochet
NOTES
Stripes are worked by dropping one color and switching to the other without cutting the yarn. This is a great method that makes the items more secure because they are worked continuously in one piece and it also means there are less ends to sew in when you finish. After crocheting a few stripes, the two colors you are working with will get a little twisted, so you may want to stop and untwist them when this happens.
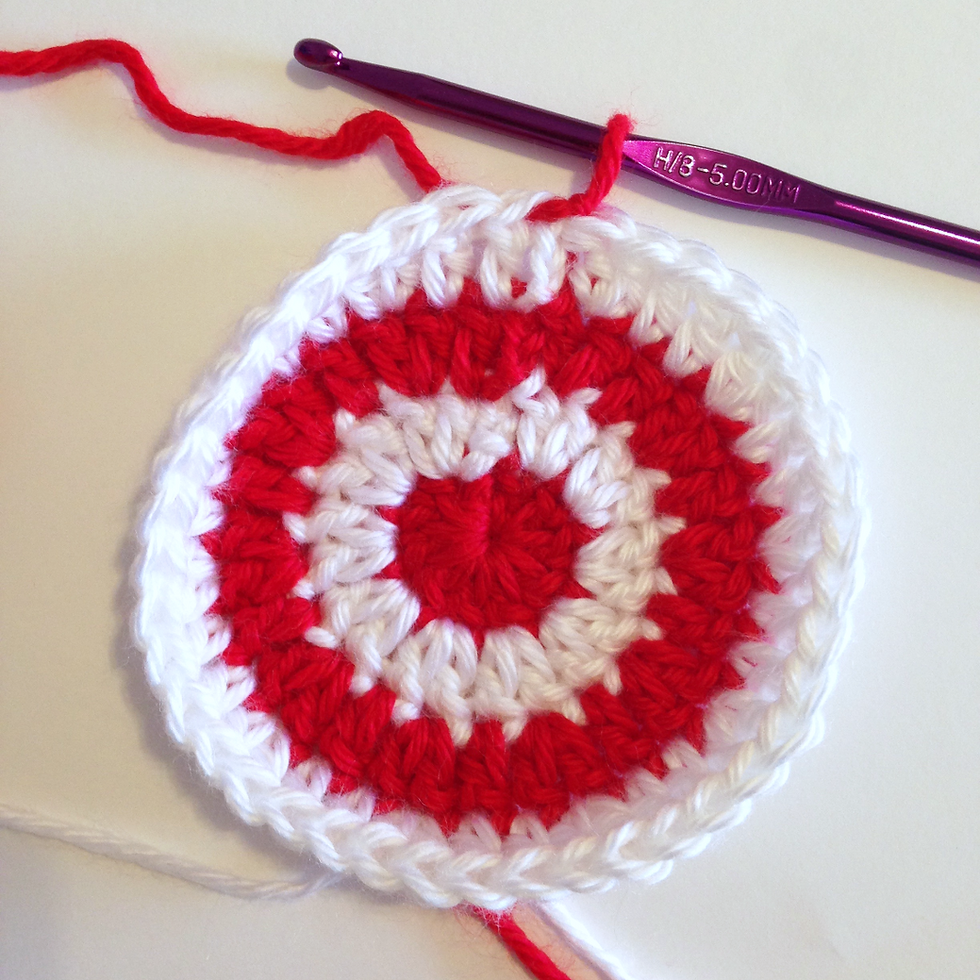
NEWBORN HAT
With red yarn, begin with magic circle. CH 2.
RND1: 10 DC in center of magic circle, switching to white in 10th DC. Do not cut red yarn. Then pull beginning red yarn end tight to close the circle. Join with SL ST in top of 1st DC. (Count=10 DC).
CH 2.


How to switch colors: Begin DC as normal. When you get to the end of the stitch when you have two loops left on the hook, drop the first color and grab the second color. Pull the second color through the two loops to complete the stitch. Do not cut yarn from first color. Video tutorial here.
RND2: With white, 2DC in same stitch. 2DC in each stitch around, switching to red yarn in last DC (drop the white yarn and pick up the red yarn that you dropped at the end of the last rnd). Do not cut white yarn. (Count=20 DC). Join with SL ST in top of 1st DC. CH 2.

RND3: With red, DC in same stitch. 2DC in next stitch. Repeat [DC, 2DC] all the way around (9 times), switching back to white in last DC. (Count=30DC). Join with SL ST in top of 1st DC. CH 2. Circle may not be flat anymore and is starting to curve in around the edges.
RND4: With white, DC in same stitch, DC in next stitch, 2 DC in next stitch. Repeat [DC, DC, 2DC] all the way around (9 times), switching back to red in last DC. (Count=40DC). Join with SL ST in top of 1st DC. Cut the white yarn, leaving a tail for weaving in. CH 2.
RND5: With red, DC in same stitch and each stitch around, switching to blue in last DC (Count=40DC). Join with SL ST in top of 1st DC. Cut red yarn, leaving a tail for weaving in. CH 2.

RND6: With blue, DC in same stitch and each stitch around (Count=40DC). Join with SL ST in top of 1st DC. CH 2.


Hat will start to fold in, like a bowl, with the right side (side facing you when you crochet) on the inside. Fold the little bowl the other way so the right side is on the outside of it. I then like to fold it in half like the second picture while I work on the rest of the hat.

This is what the inside of the hat looks like where the stripes switch colors.
RND7: Repeat RND6
RND8: Repeat RND6
RND9: Repeat RND6
RND10: With blue, DC in same stitch and each stitch around (Count=40DC). Join with SL ST in top of 1st DC. CH 1. Pull yarn to tighten knot. Cut blue yarn, leaving a tail for weaving in. Turn hat inside out and weave in all (6) ends, then turn it back to right side out.

LEG WARMERS (make two)
(Count=20 for every row)
With blue, CH 20. Join with SL ST in 1st CH, under top two loops, to close the circle. CH 2.

ROW1: DC in same stitch and in each stitch around. Join with SL ST in top of 1st DC. CH 2.
ROW2: Repeat ROW1
ROW3: Repeat ROW1
ROW4: Repeat ROW1
ROW5: DC in same stitch and in each stitch around, switching to red in last DC (see above for how to switch colors). Join with SL ST in top of 1st DC. CH 2. Cut blue yarn, leaving a tail to weave in.

ROW6: With red, DC in same stitch and in each stitch around, switching to white in last DC. Join with SL ST in top of 1st DC. CH 2.
ROW7: With white, DC in same stitch and in each stitch around, switching back to red in last DC. Join with SL ST in top 1st DC. CH 2.
ROW8: Repeat ROW6
ROW9: Repeat ROW7
ROW10: Repeat ROW6
ROW11: Repeat ROW7
ROW12: With red, DC in same stitch and in each stitch around. Join with SL ST in top of 1st DC. CH 1. Pull yarn to tighten knot. Cut red and white yarns, leaving a tail to weave in. Turn leg warmer inside out and weave in all (6) ends. Turn leg warmer back to right side out.


STAR (make three)
For my Star video tutorial, Click Here.
With white, begin with magic circle. CH 1. SC 10 inside the circle. Pull beginning yarn tight to almost close the circle. Join with SL ST in top of 1st SC.
*[CH 4. Skip one CH and SC in 2nd CH from hook, top loop only. HDC in next CH. DC in next CH. Skip one SC of circle and SL ST to complete one star side]. Repeat from * (4) more times.
Cut yarn, leaving a long tail about 24 inches long. Weave in beginning white yarn tail. Leave the long ending tail as it will be used for attaching the star to the hat/leg warmer.
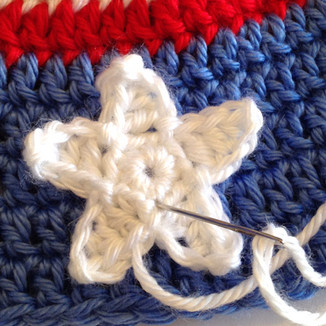
ASSEMBLY
Star is attached to the blue portion of the hat and leg warmers using the long ending tail of the star and a yarn needle.
Thread the long tail with a yarn needle. Position the star how you would like it.
Insert needle through the star where the last SL ST joined the star point to the circle. Then go through the front of the hat to the inside of the hat. Hold the star in place with one hand while you sew with the other.
Begin sewing around the outside edges of the star to attach it to the hat: Bring the needle from the inside of the hat, back out the front of the hat, through the star. Work in one chain stitch and out the next.
End with the yarn on the inside of the hat. Once star is sewn onto the hat, weave the yarn back and forth a few times on the inside of the hat under the star to secure it. Cut off excess yarn.
Repeat this same process to sew the stars onto the leg warmers.


Congratulations on completing your project!! :)
-Amanda
Copyright: Written pattern and pictures are © Crochet To Z, 2015. If you want to share this pattern, do so by linking back to this page. Do not photocopy, rewrite, repost, redistribute or resell this pattern in any way. However, the finished product that you make from the pattern is YOUR creation to do with it what you wish – keep it, gift it, donate it, or sell it!


Comments